
Last week I popped into Ditto to have a look at the new season fabrics, and totally fell for this beautiful vintage looking viscose crepe.

Not sure what I’d make I bought 2.5m (my standard impulse-buy length), this way I knew there’d be enough for anything from a maxi dress or lining for a long coat.
Spurred on by the beautiful weather, I made my gorgeous fabric into a retro smock-dress over the weekend.
It’s perfect for this time of year as it can be worn with leggings, boots and an oversized cardi, or ballet pumps and bare legs.

The pattern I used was Burda 6967.

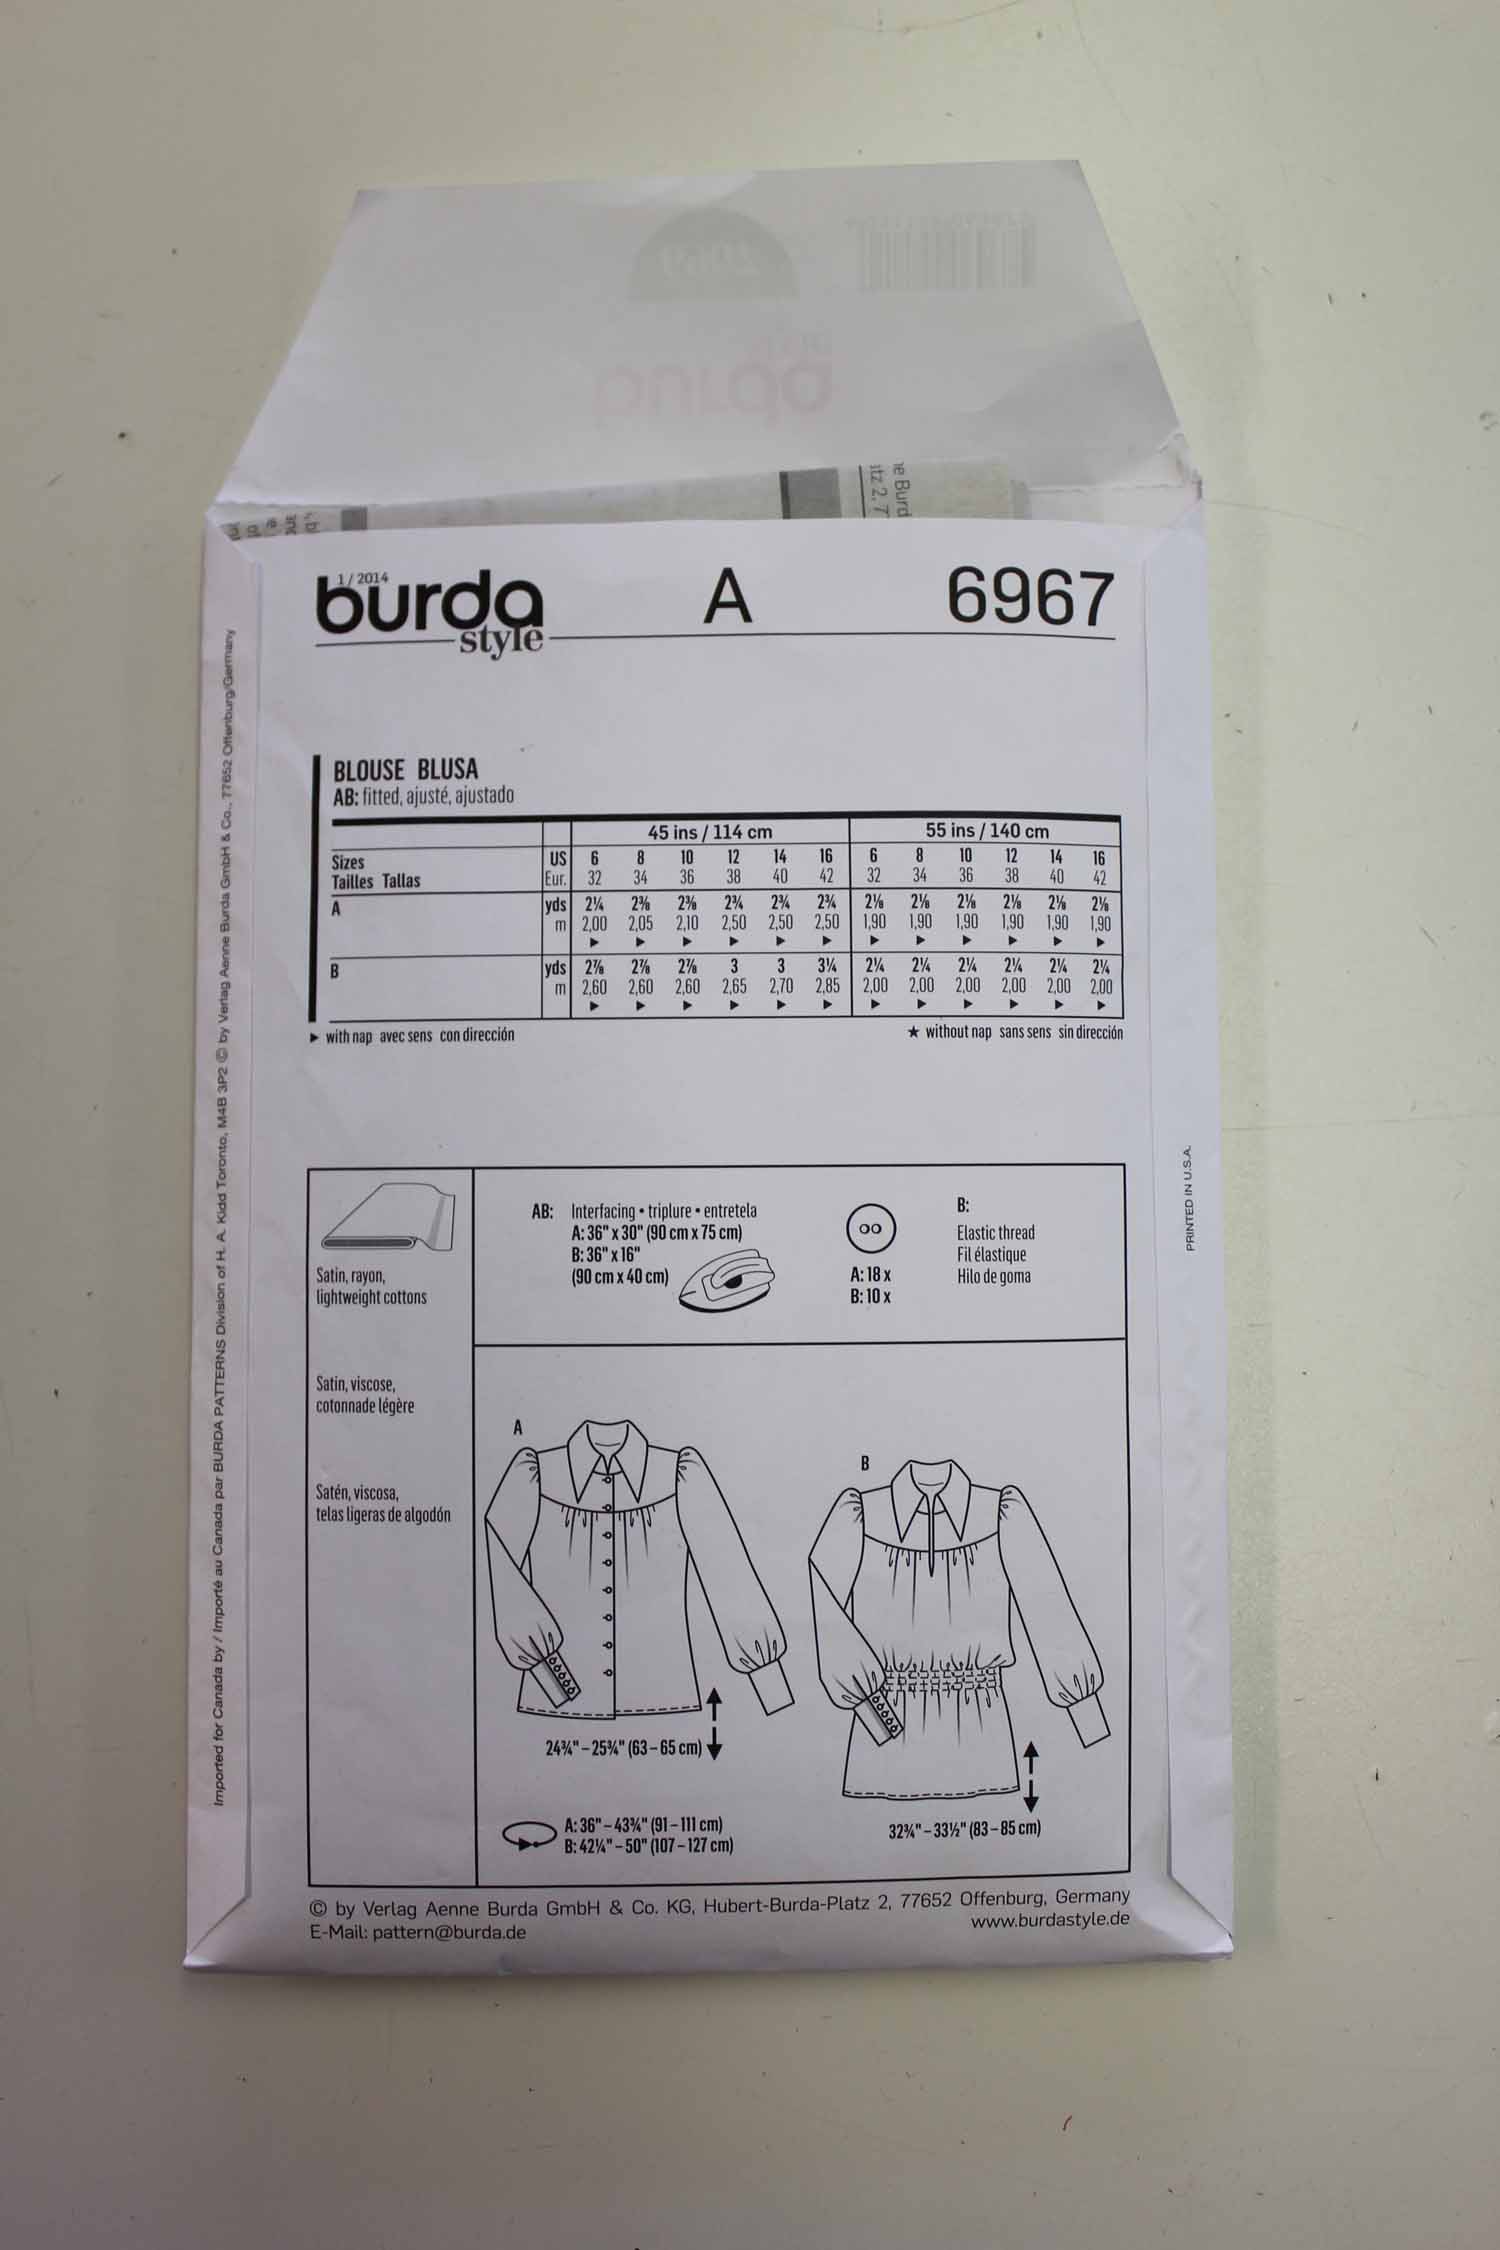
Never content with keeping life simple and using a pattern just as it is I decided to alter the neckline, losing the oversized collar and adding contrast piping to define the yoke and new neckline. I always doodle my ideas out first to see how they might look.

Altering the neckline was simple enough, this is how I did it…
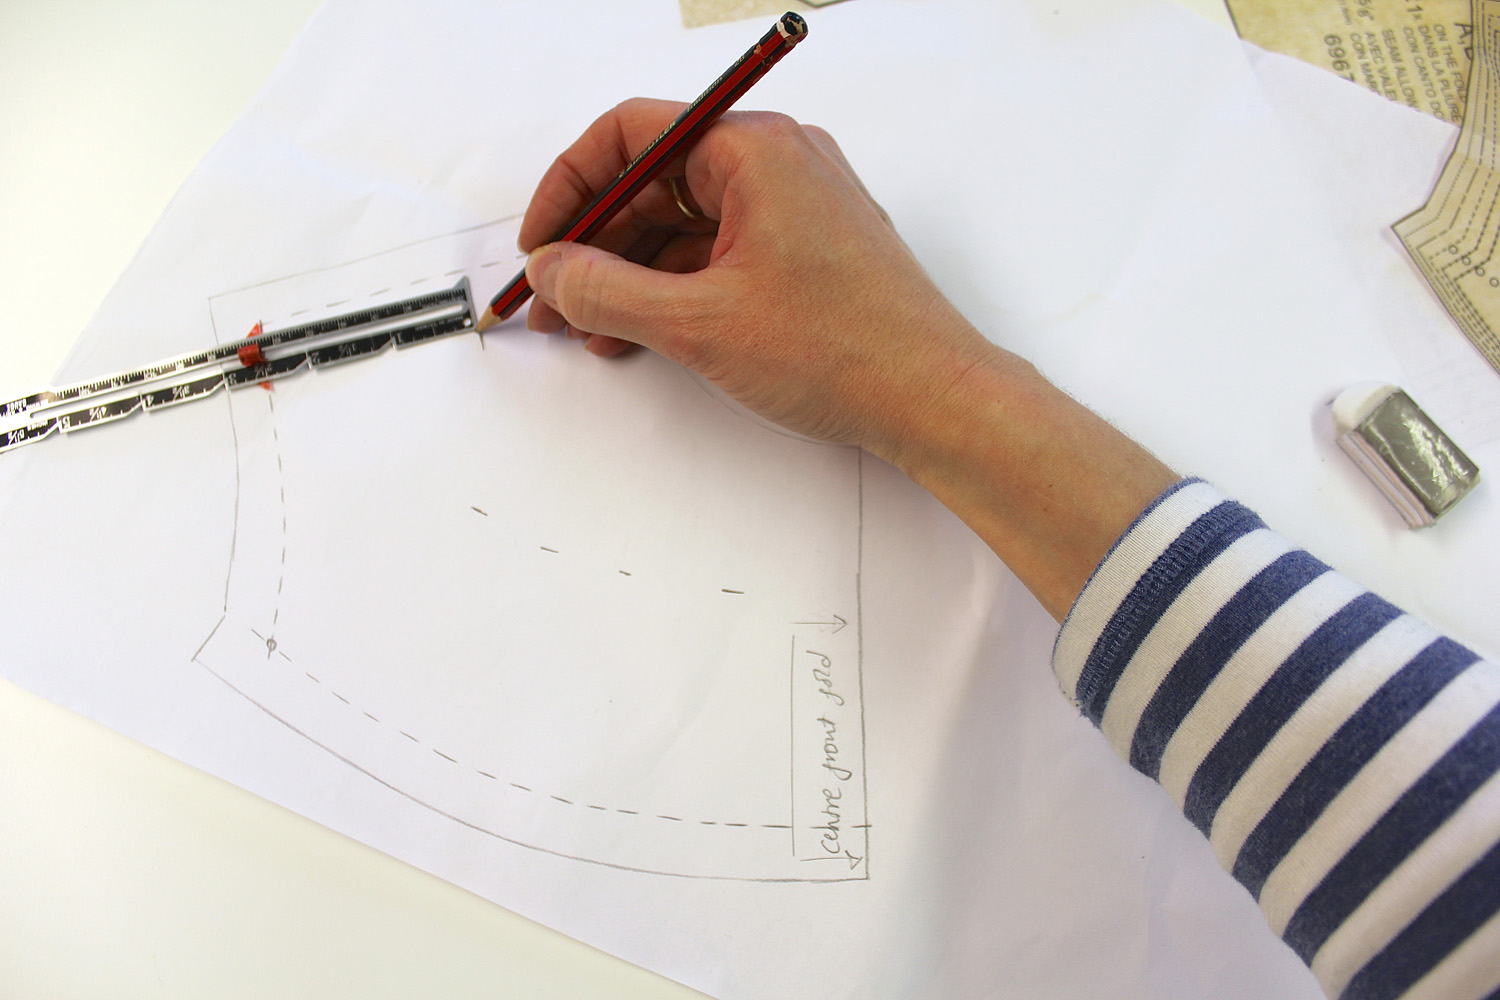
Trace the existing yoke pattern pieces in your size

Draw the stitching line onto the traced pattern piece then decide how deep the new yoke will be, I went for 2.5 inches.

Using a seam allowance gauge or ruler, draw the new neckline, keeping the curve parallel to the stitching line along the bottom edge…

and the side edge…
Then add the seam allowance onto the new yoke, and cut out the pattern, keeping the excess paper from the old neckline …
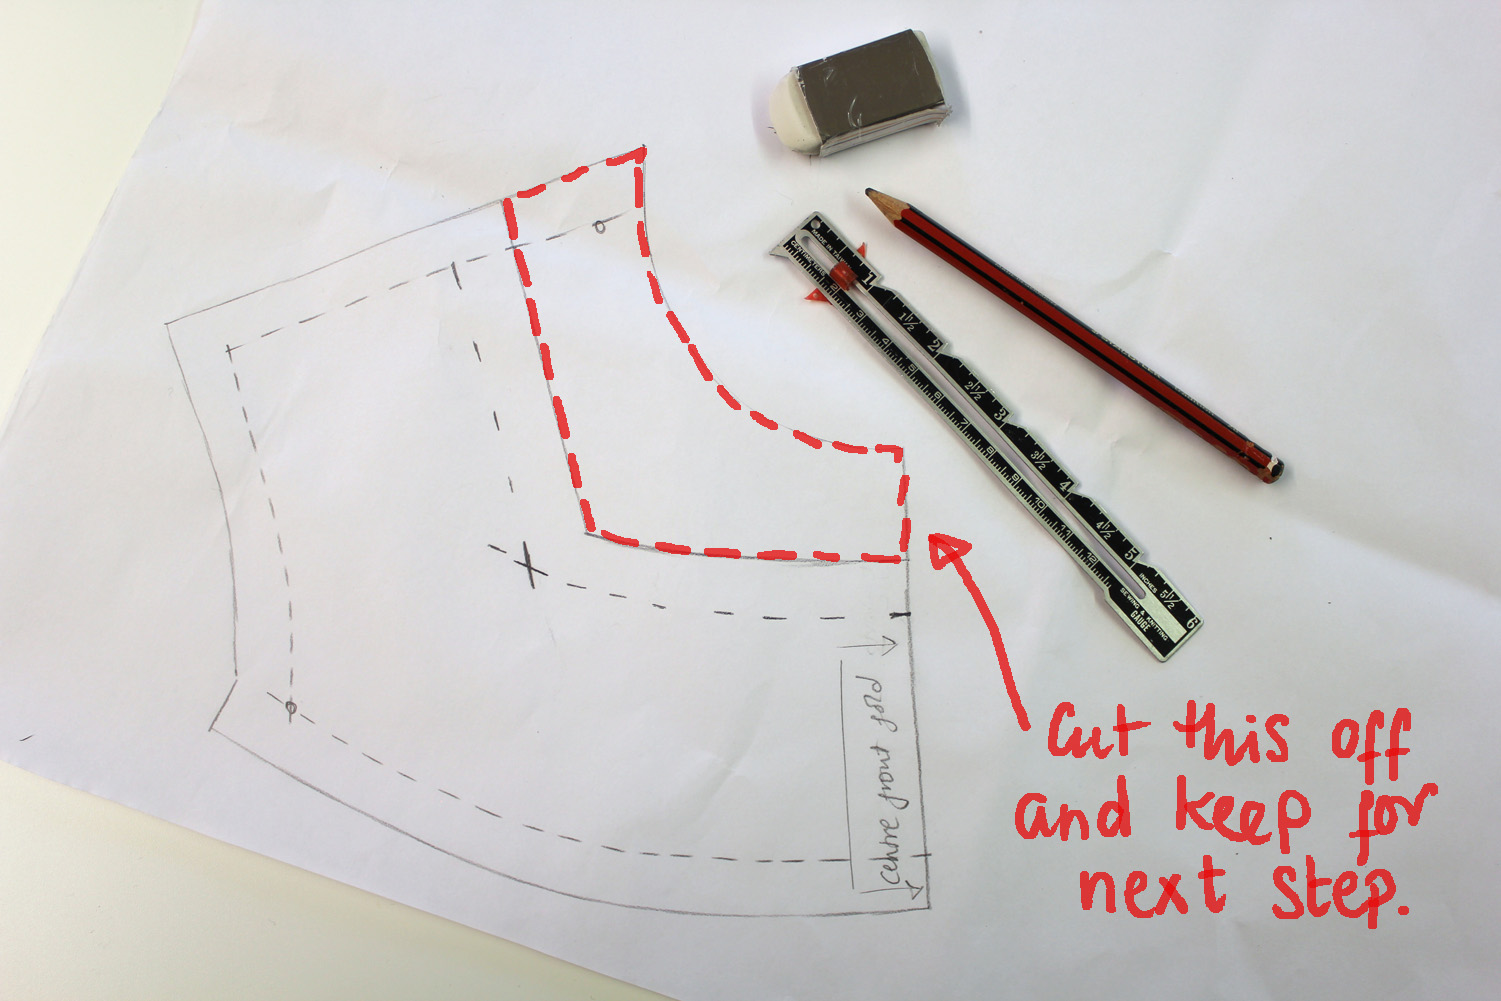
Then repeat this process for the back yoke.
The front facings also need to be altered as they will no longer fit the neckline. Trace the facing pattern then using the pieces trimmed from the old front yoke, draw the new neckline onto the facing…

As the original facing was too skinny to be effective with my alterations, I widened it to be a good two inches deep at the corner of the neck…

My new pattern pieces looked like this…

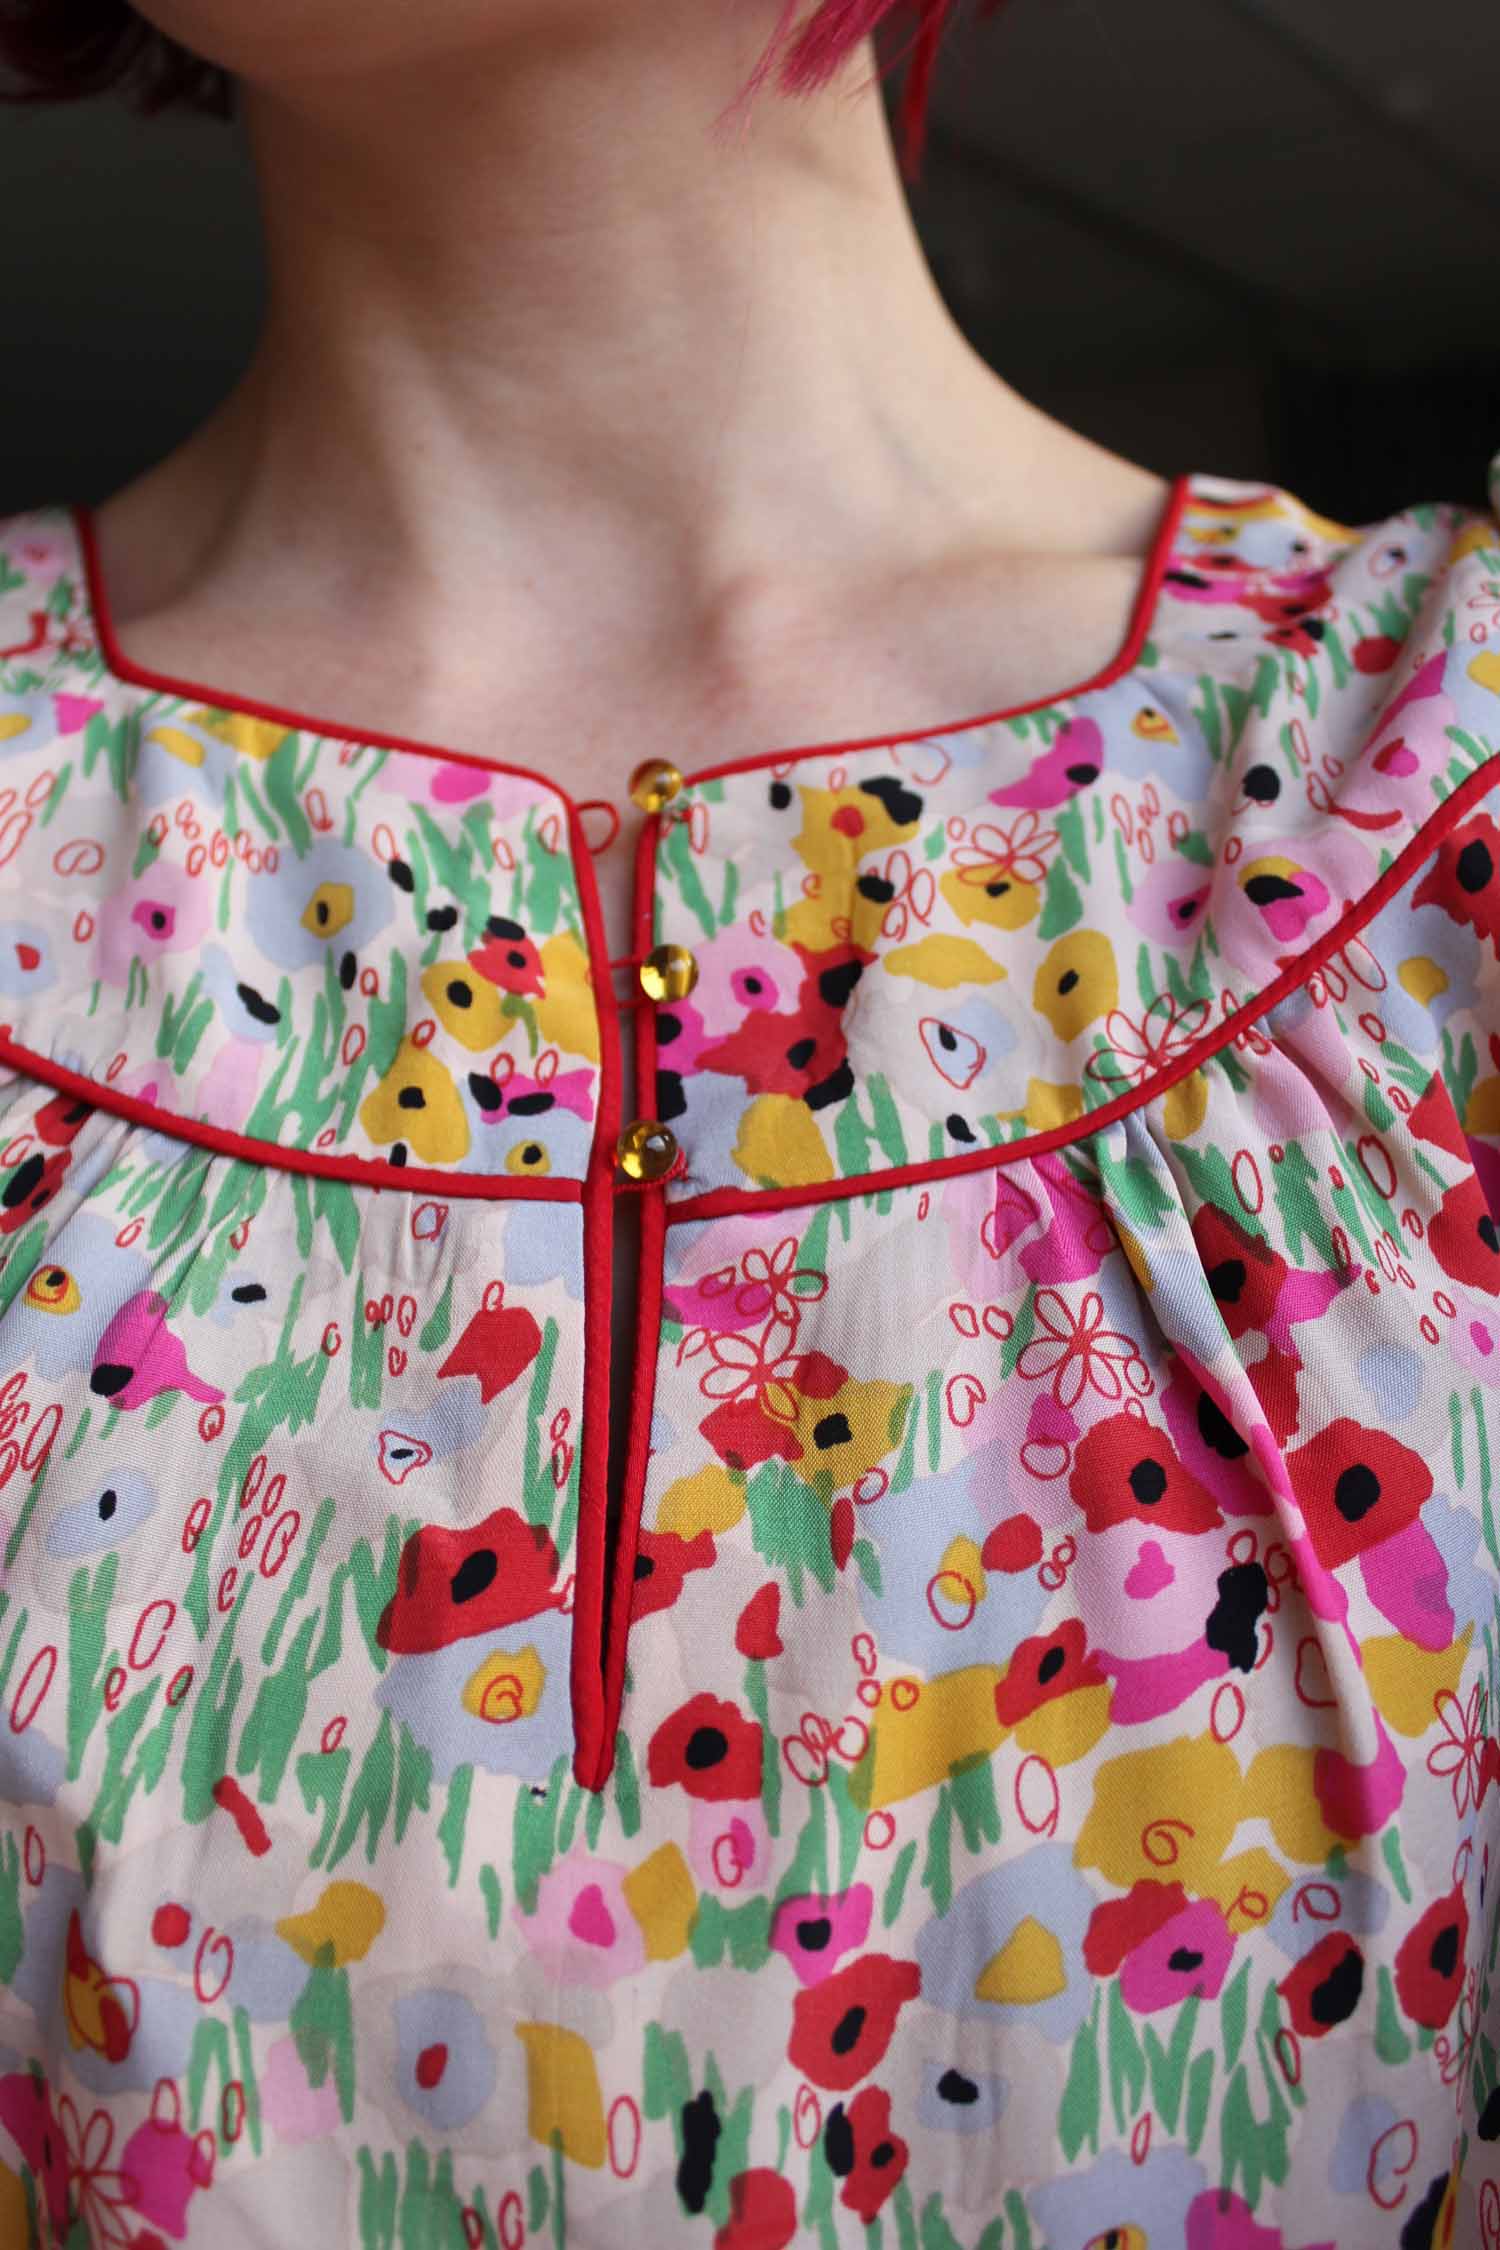
With these simple alterations I’ve completely changed the feel of this pattern, opening up the neck so I can wear a necklace or dangly earrings.
Here’s a little tip for working with a floppy fabric to achieve structured features like collars, cuffs and facings:
Cut out your interfacing first…

Then lay it onto the fabric and press. You can now cut out your pieces without the fabric shifting out of shape…
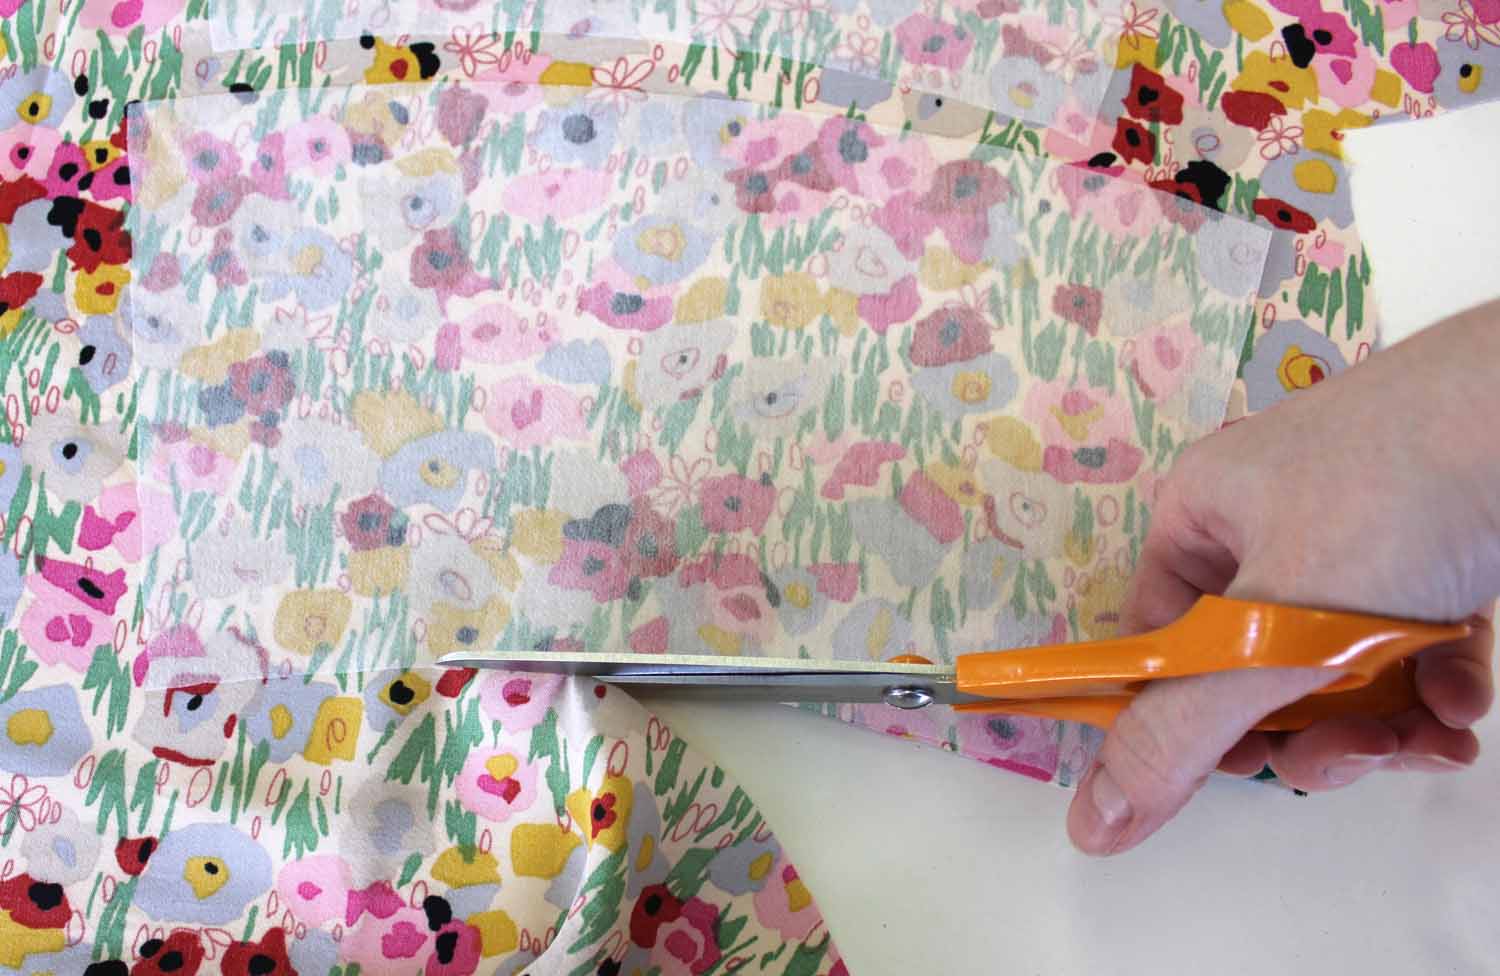
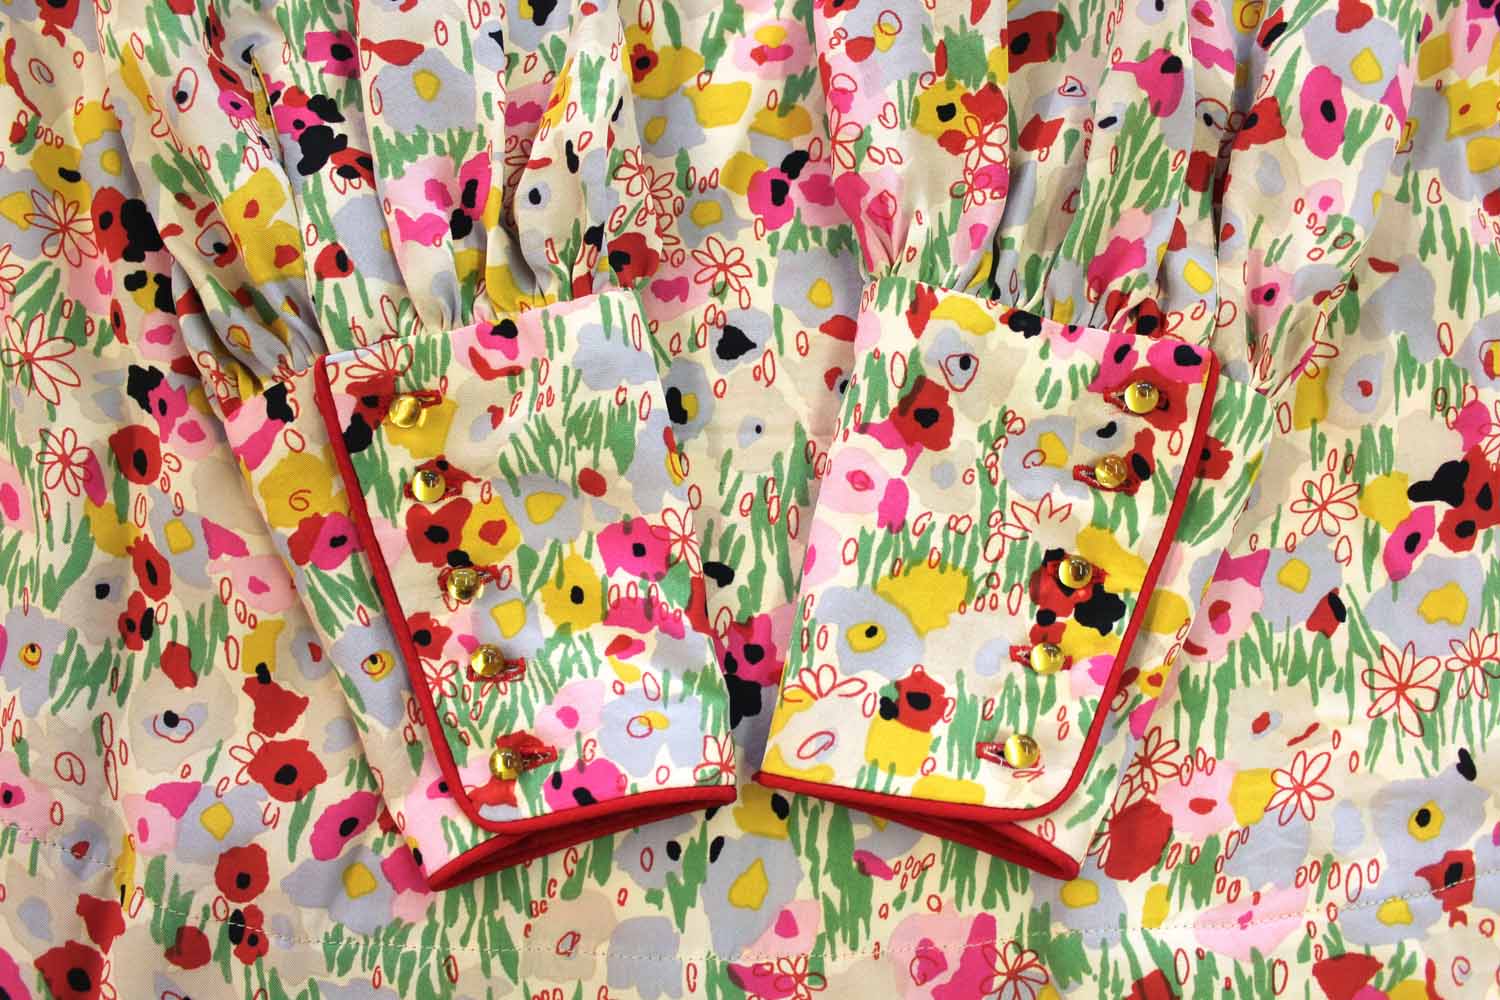
Beautifully crisp cuffs, no wobbly edges in sight!
Here’s me in my new dress enjoying the spring sunshine.


I’m happy with way this dress has turned out, although I may still change the buttons for red ones. I’ll also probably wear it with a low slung belt as there is no waist definition to the pattern and I need all the help I can get to give me a bit of shape.
I will definitely use this pattern again, I can just imagine these sleeves in billowing chiffon…
I hope this inspires you to make a versatile spring dress.
Happy sewing!